
There are countless methods of composting, but which one is best for you and your space?
We’ll explore the many different indoor and outdoor composting options to help you choose the best fit for your home and outdoor space.
Jump Ahead To...
Why Compost?
Composting is simply the decomposition of organic matter into nutrient rich soil fertilizer.
If you aren’t composting already, consider these reasons to start ASAP:
- Composting is an eco-friendly way to dispose of food and yard waste, as well as other natural fibers (hair, dryer lint, and 100% cotton, linen, or wool fabric, etc.)
- A compost bin keeps food and other items out of landfills. Tossed food causes the production of methane in landfills as it breaks down, due to lack of oxygen. Here’s what actually happens to landfill waste.
- Compost keeps your soil healthy, and therefore your plants too! Compost adds beneficial nutrients into the soil that plants thrive on.
- Composting saves money on fertilizer. Nutrient rich soil means less money spent on commercial plant food.
- Finally, you’ll reduce overall household waste. (We’ve reduced enough waste over the years to cancel our trash pickup service!)
Above all, whatever composting type you choose is a vote to create a more sustainable planet!
16 Methods of Composting for a Greener Home in 2021
Click on a composting method below to read more or keep scrolling if you want to learn about each of them. We’ll cover pros, cons, cost, and materials needed for each method.
The methods of composting are broken into three categories:
- indoor composting
- outdoor composting for small spaces
- outdoor composting for large spaces
Indoor Methods of Composting
These three composting types are great for smaller, indoor spaces. No yards, manual labor, or heavy equipment required!
1. Vermicomposting
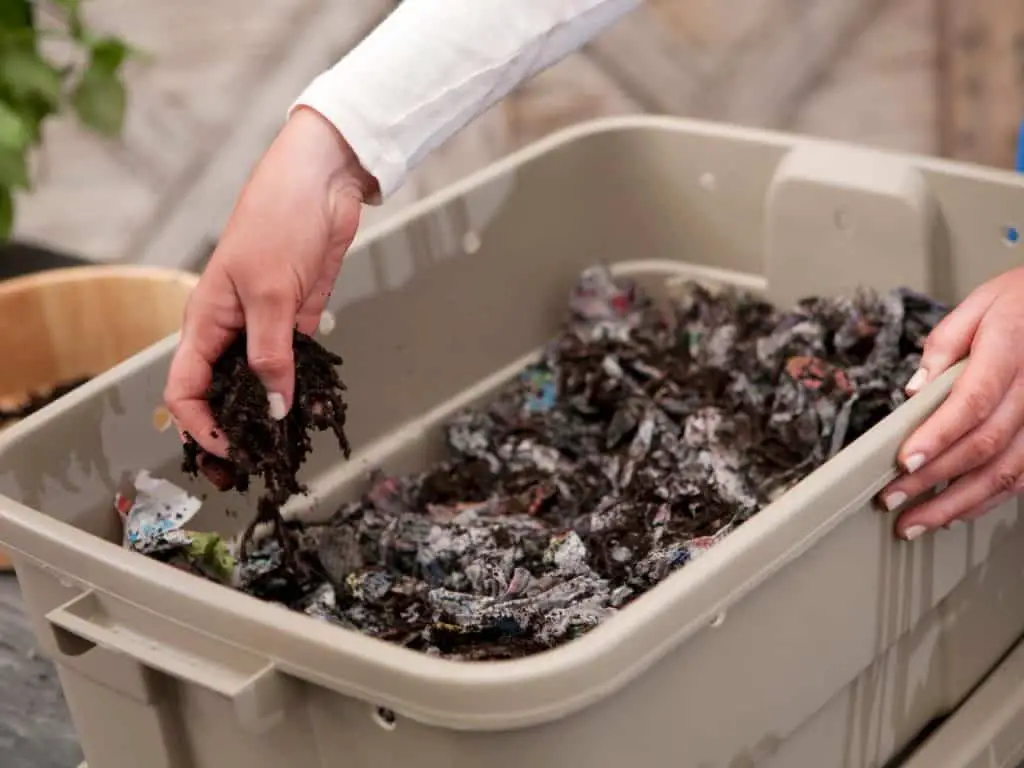
Vermicomposting is the use of worms (specifically red wigglers) to produce compost in the form of castings, or worm poop. This is one of the best ways to compost in small spaces, plus it’s hands off for the most part!
HOW IT WORKS
Worms kept in a moist worm bin break down food waste and brown, carbon rich materials (cardboard, paper towels, hair, dryer lint, etc.). Eventually the worms digest the material and poop out nutrient rich compost, or worm castings! Castings can also be used to make worm tea (another beneficial fertilizer that plants love).
One pound of worms will break down about two pounds of food scraps per week.
PROS
- great for apartments and small living spaces
- aerobic (uses oxygen, so no methane is produced)
- low maintenance and mostly hands off
- year round composting possible
- relatively inexpensive
CONS
- not ideal for vegans
- no meat or dairy products are allowed
- may attract fruit flies and produce odor if too much food waste is added
- worms multiply extremely fast, which means you’ll need to give some away, release them outdoors, or get a bigger bin
- separating worms from castings for garden use may be a hassle
- can take up to 3-4 months before compost is usable
AVERAGE COST
$50-$200 US
MATERIALS NEEDED
Vermicomposting requires anywhere from 250-1,000 red wigglers, which you can buy online. These worms multiply very quickly, therefore some individuals start out with a smaller amount. However, more worms may be needed for those with a large amount of food waste.
- approximately 1 pound, or around 1,000 red wigglers
- worm bin
- soil
- proper ratio of brown to green organic waste
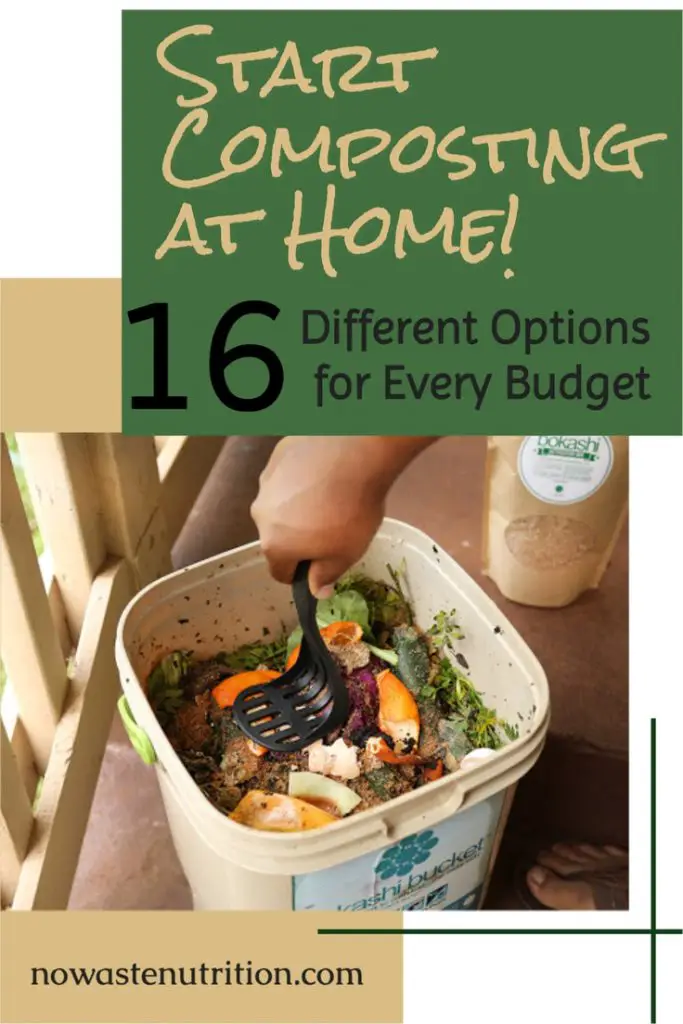
2. Bokashi Composting
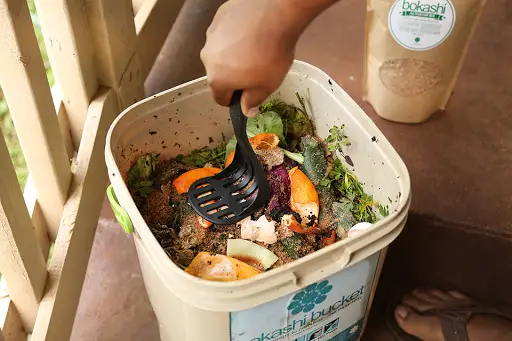
Bokashi refers to the process of breaking down organic waste through fermentation. The Bokashi composting method was developed by a Japanese professor in the 1980’s.
HOW IT WORKS
Food waste– including bones, meat, and dairy products– is placed in an airtight bokashi bucket and layered with inoculated bran or wheat germ. The bran or germ feeds the waste fermenting microorganisms. This method is anaerobic, meaning no oxygen is necessary for breakdown to occur.
Liquid is produced throughout the process, which is drained through the spigot found toward the bottom of the bucket.
This method of composting can be done indoors, but you will need some outdoor access to finish the process.
The final broken down product needs to either be buried (preferably either in a garden trench away from young plant roots or in a traditional compost pile.) This further breaks down the fermented mixture, turning it into usable compost.
PROS
- great for apartments and small living spaces
- bones, meat, and dairy are okay
- low maintenance and mostly hands off
- year round composting possible
- relatively inexpensive
- compost is complete within 1-2 months
CONS
- anaerobic, which means a small amount of methane is produced
- may be smelly when bucket is opened
- requires some outdoor space for finishing product
- several buckets may be needed
AVERAGE COST
$60-$100
DIY instructions
MATERIALS NEEDED
- indoor composting bucket with spigot
- inoculated bran
- food waste
- outdoor space for burying mixture
- shovel
3. Electric Composter/Food Recycler
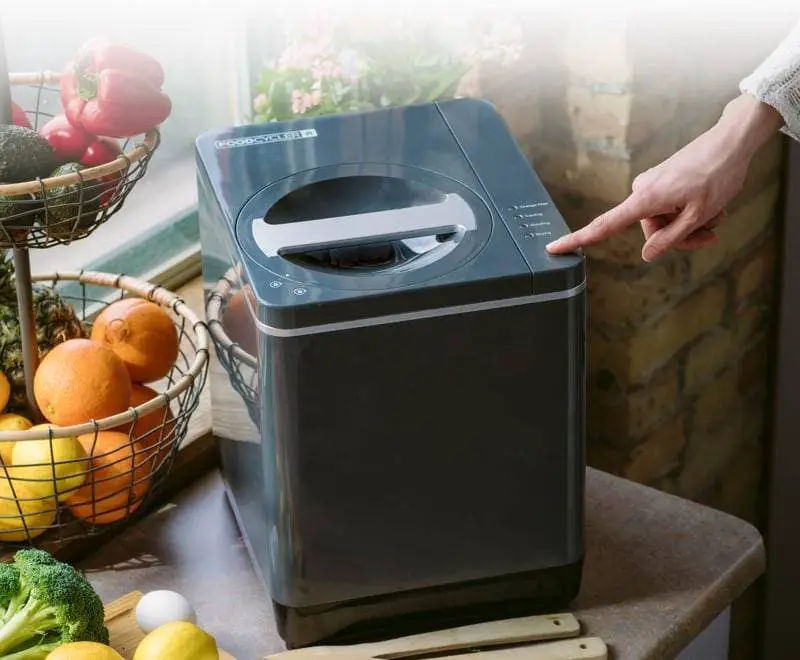
Electric composters, also known as food recyclers, are small enough for countertops and can breakdown all food waste. They create ‘compost’ in less than 24 hours, which is by far the fastest method available.
This method of composting does not produce the moist, bacteria rich, black compost you may be thinking of. Instead, the final product is a bacteria free, dry, powder-like material that can still provide beneficial nutrients in the garden or yard.
HOW IT WORKS
Food recyclers work in a three phase system:
- Drying: Food waste is heated to 160 degrees Fahrenheit. This helps decrease the material’s volume by 90% and kills off any pathogens, sterilizing the product.
- Grinding: Grinding gears turn the material (exactly like turning the pile in a traditional compost bin), further breaking it down. At this point, it’s nearly ready to be mixed with soil in the garden or lawn.
- Cooling: Contents are returned to room temperature. Then the final product is ready for application.
PROS
- perfect for small spaces and fits on most countertops or under the sink
- usable year round
- accepts all foods, including bones, dairy, meat, cheese, etc.
- food broken down in 5 to 24 hours.
- no manual labor needed
- no methane produced
CONS
- higher price
- requires filter change every 3 to 4 months
- uses energy
- not true compost
- cannot be used as topsoil
AVERAGE COST
$150-$300 + recurring filter expenses ($45-50 every 3-4 months)
MATERIALS NEEDED
- electric food recycler
- filters (every 3-4 months)
- food waste
Best Outdoor Methods of Composting (for Small and Large Spaces)
Next, let’s compare the many different ways to compost outdoors. There are plenty of options no matter how much outdoor space is available.
Types of Composting for Smaller Outdoor Spaces
Small yard? Don’t fret! There are plenty of ways to compost food waste with little space!
4. Heap Composting
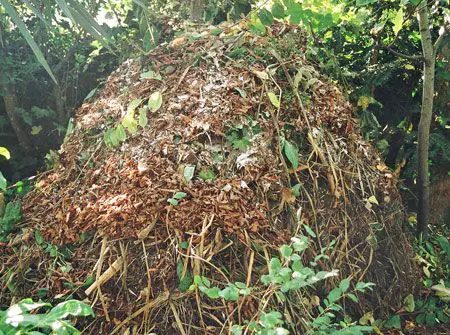
This traditional method sounds exactly how you may imagine. Organic green and brown waste is piled in a heap and left to decompose. All it takes is about a 2 feet by 2 feet space.
HOW IT WORKS
Traditional composting uses microbes, like bacteria and fungi, to break down organic waste. First, a layer of carbon rich brown materials create the base. Then layers of browns and greens are added.
Compost piles generally need twice as many brown materials. This allows oxygen to easily flow through and keeps the pile from getting too smelly.
Once the pile reaches about three feet, compost is formed quickly, as long as it’s turned every three to five days. The process speeds up once internal temperature rises to 160 degrees Fahrenheit. Heat also kills weeds, disease pathogens, and harmful insects.
Compost still forms even when the heap is left to sit without being turned. This method is known as ‘cold composting’ because heat isn’t generated and may take years to actually decompose.
PROS
- inexpensive
- most natural and sustainable method
- easy to see finished compost
CONS
- may attract pests and unwanted insects
- not attractive
- no bones, dairy, or meat allowed
- can take several months up to two years for compost to form
- some hands on labor required
- composting slows down in cooler temperatures
AVERAGE COST
free + cost of turning tool ($20-$70)
MATERIALS NEEDED
- brown, carbon waste and green, nitrogen waste (2:1 ratio)
- shovel, pitchfork, or other aerator tool
5. Tumbler Composting Method
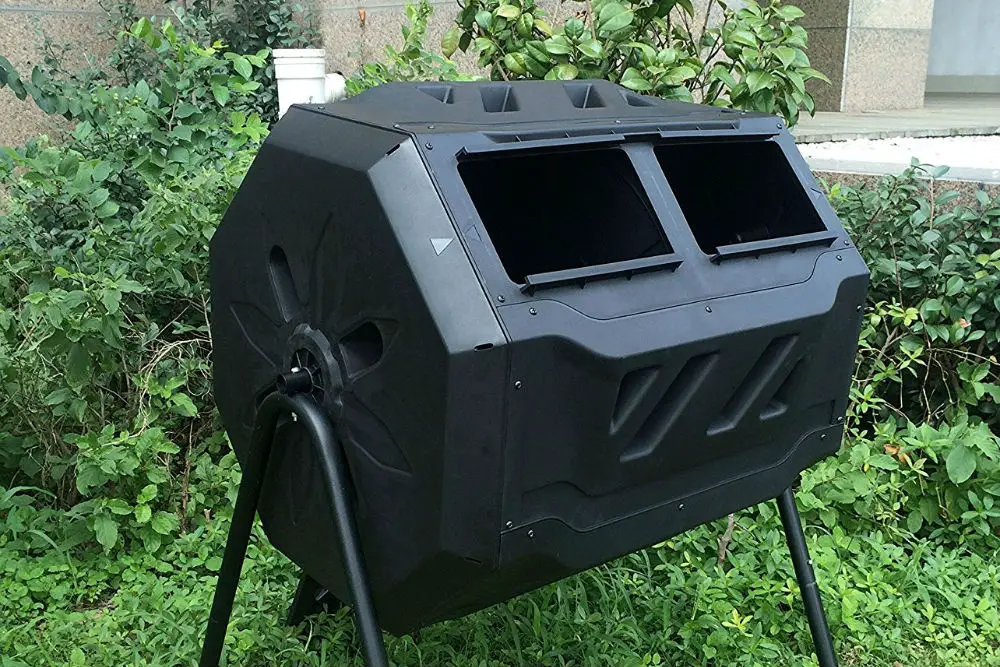
This is currently one of the most popular methods of composting. Organic material (browns and greens) are placed in a barrel shaped tumbler, which needs to be turned every few days. Composting in a tumbler is easy, compact, and low maintenance.
HOW IT WORKS
Brown and green materials are place in a tumbler, along with soil or finished compost to jumpstart the process. The tumbler is turned every three to four days to aerate the mixture so all microbes get oxygen. A full tumbler will produce more heat, which breaks down the waste even faster.
Finished compost takes anywhere from one to six months using the tumbler method.
PROS
- no manual labor necessary
- perfect for smaller yards and outdoor spaces
- inexpensive
- keeps animals away
CONS
- may attract fruit flies and pests if organic material balance is off
- no bones, meat, or dairy allowed
- composting slows down in cooler temperatures
- may take up to six months
AVERAGE COST
$35- $100+
MATERIALS NEEDED
- compost tumbler
- organic brown and green material in a 2:1 ratio
- soil or finished compost to jumpstart the decomposition process
6. Compost Bin Method
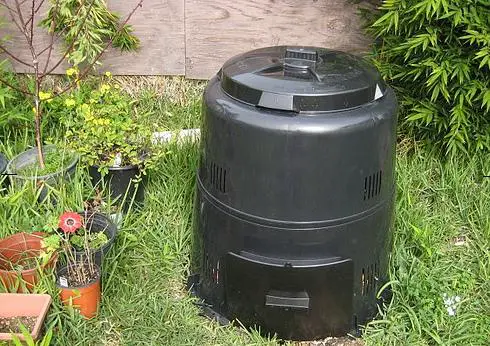
The compost bin method features a heap of organic materials housed in an upright cylinder structure. It’s essentially a combination of the heap and tumbler methods, except the bin is stationary.
Compost bins are usually made of plastic, but some DIY versions are made of wood pallets.
HOW IT WORKS
The compost bin has an open bottom, which is placed directly on the ground and usually held in place with stakes. Waste material is added in layers, starting with brown waste on the bottom.
Like the heap method, the contents must be turned every three to four days to mix microbes and incorporate oxygen.
The microbes also need water to survive and continue the decomposition process. Contents of the compost bin should remain damp, like a wet sponge that’s been wrung out.
Most compost bins have a small door that slides up or opens at the bottom for easy access to finished compost.
PROS
- inexpensive
- great for small yards
- keeps out vermin
CONS
- bones, meat, and dairy are not acceptable
- needs to manually turned
- only applicable with outdoor space
- can take from 3 months to 1 year for compost to mature
AVERAGE COST
$50-$150
DIY version
MATERIALS NEEDED
- compost bin
- organic brown and green materials in a 2:1 ratio
- shovel, pitchfork, or other compost aerator
7. Green Cone Composter
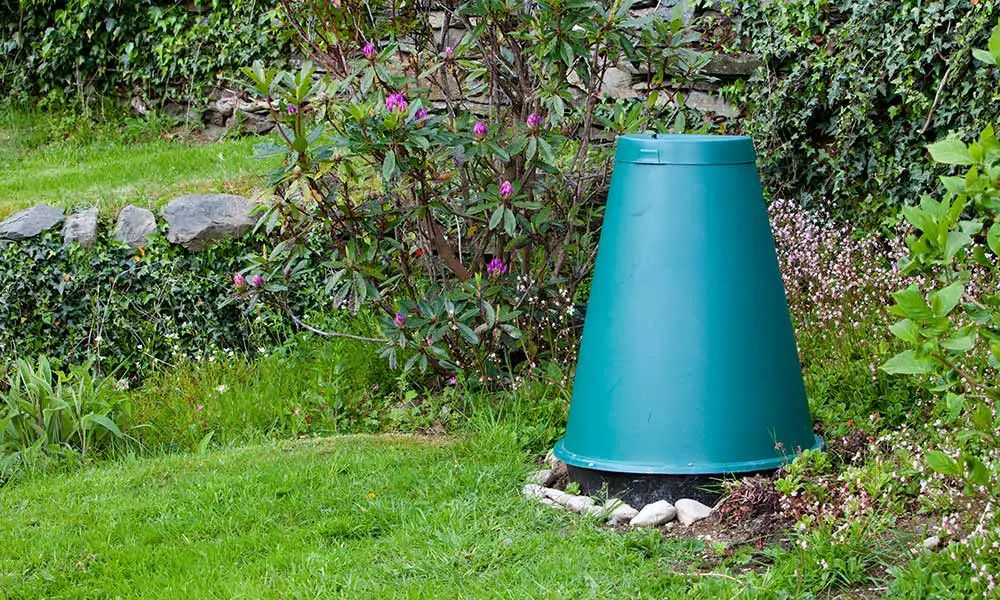
The Green Cone is one of the more unique methods of composting available. It’s an easy and unique way to manage food waste that was developed in the UK. The Green Cone uses a special in-ground system powered by solar power to break down food.
HOW IT WORKS
The Green Cone features a slotted basket that sits underground. Food waste (and solid pet waste) is placed inside the cone through a removable lid. Microbes, worms, and other critters move through the underground basket to digest the contents.
A double walled solar cone creates a heat trap that circulates oxygen to promote bacteria growth. In addition, water evaporates and filters throughout the soil, further helping decompose waste.
The Green Cone can digest up to 1.5-2 pounds of waste per day, and comes with compost accelerator powder to help speed the process in cooler weather.
PROS
- no physical compost turning necessary
- no brown, carbon materials needed
- accepts all food scraps, including bones, meat, and dairy
- no odors
- keeps pests and vermin away
- accepts up to 2 pounds of waste per day
- only needs emptying every 2-5 years
CONS
- unable to harvest compost
- composting slows in cooler temps
- requires special accelerator
- relatively expensive
AVERAGE COST
$200 USD
MATERIALS NEEDED
- flat outdoor space
- shovel for digging hole for in-ground basket
- Green Cone Composting system (comes with accelerator)
8. Compot Composting
Compot composting is similar to the Green Cone method, but on a smaller scale. Both methods of composting feature a slotted basket that sits underground where food waste is stored.
Once the Compot basket is full, a screw on lid is secured in place and covered with straw or other material. The lid can also be used to propagate seeds along with the Propagator Top.
HOW IT WORKS
A small slotted basket sits underground. Food waste is placed inside and the lid is secured on. Compost will be created in four to six weeks. The compost may either be harvested or it will empty by itself if left undisturbed.
The lid for this composting system can be turned upside down to propagate seeds. Simply invert the lid, add soil or potting mix and seeds, secure the Propagator Top, water as needed, and watch the plants grow! It’s like a mini, portable greenhouse!
PROS
- small and portable for small spaces
- all waste acceptable, including bones, meat, and dairy.
- no manual turning necessary
- interesting feature that propagates plants
CONS
- may need more than one pot for food waste due to smaller size
- outdoor space needed
- limited shipping available from Australia
AVERAGE COST
$35-$55 Australian dollars
MATERIALS NEEDED
- Compot Composting system
- brown and green organic materials
Easy DIY Methods of Composting
These next few methods of composting are made possible by inexpensive DIY projects.
9. Composting in a Trash Can
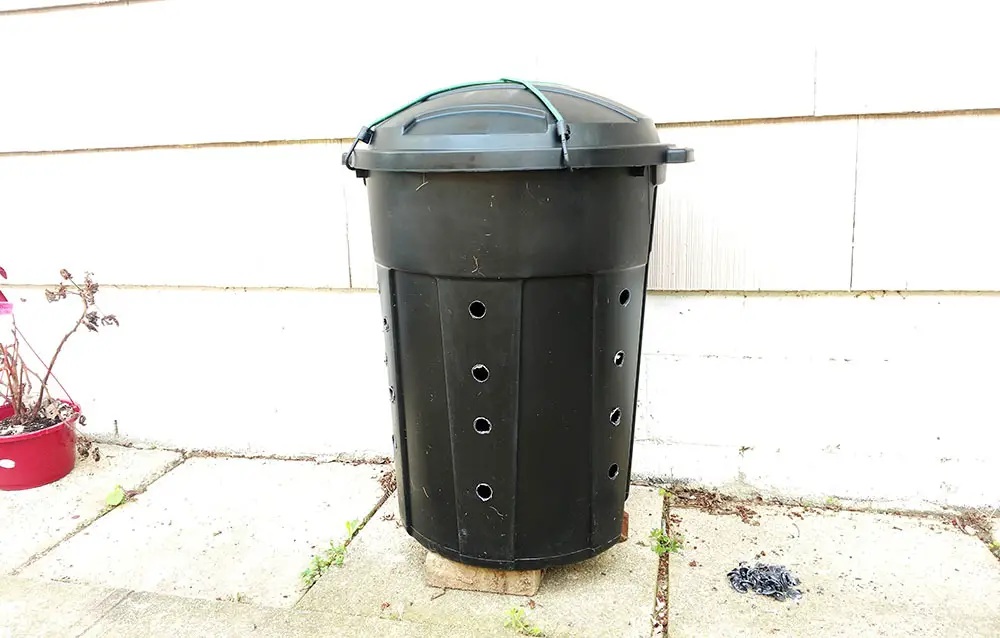
Fashioning a compost bin from a trash can (or barrel, plastic storage bin, or bucket) is cheap and simple. It’s the perfect way to make use of a household item that otherwise may be collecting dust in the garage.
This method is exactly like composting in an official compost bin, except compost bins usually have an open bottom. It’s not required for trash can composting, as long you provide an access door.
Follow these steps to make your own compost bin out of a trash can, barrel, plastic storage bin, or bucket:
- Secure a container preferably three feet tall by three feet wide for best results. (Smaller sizes are ok, but waste material may take longer to break down).
- Ensure the trash can or container has a secure lid.
- Drill 1 inch holes around the container and in the lid about 6 inches apart. This allows oxygen to flow through the contents.
- If pests are a problem, cover each hole with window screen mesh from the inside of the container. (Note: many critters like worms and soldier flies help the waste material break down faster, therefore the screen covers are a personal choice).
- Optional: Cut out an access door at the bottom for scooping out finished compost. Secure the door with zip ties or bungie cord when not in use.
HOW IT WORKS
The compost bin works with either an open or closed bottom, which is placed directly on the ground. Waste material is added in layers, starting with brown waste on the bottom.
Like the heap and bin method, the contents must be turned every three to four days to mix microbes and incorporate oxygen.
The microbes also need water to survive and continue the decomposition process. Contents of the compost bin should remain damp, like a wet sponge that’s been wrung out.
PROS
- inexpensive
- great for small yards
- keeps out vermin
CONS
- bones, meat, and dairy are not acceptable
- needs to manually turned
- only applicable with outdoor space
- decomposition slows down with cooler temps
- can take from 3 months to 1 year for compost to mature
ESTIMATED COST
free if materials already on hand
MATERIALS NEEDED
- trash can
- drill
- screen mesh
- brown and green organic material
10. Wire Bin Composting
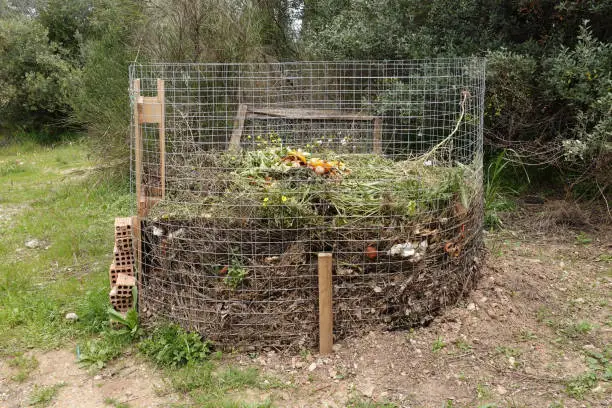
A wire bin system is one of the easiest DIY methods of composting. You can get all the items needed to build a wire bin from your local hardware store for just a few dollars.
Follow these steps to create a compost bin made of mesh wire:
- Purchase a roll of 3 feet by 10 feet fencing wire with 1 inch mesh.
- Wear glove and safety glasses due to the sharp cut wire edges.
- Fashion the wire in a circle and fasten ends together at the top, middle, and bottom with zip ties or wire.
- Optional: Stake 2 in wide pieces of wood in the ground to help hold the wire fencing shape in place.
HOW IT WORKS
A mesh wire bin holds all the green and brown compost materials. It’s also works similarly to the traditional compost bin system. Waste material is added in layers, starting with brown waste on the bottom.
Like the heap method, the contents must be turned every three to four days to mix microbes and incorporate oxygen.
The microbes also need water to survive and continue the decomposition process. Contents of the compost bin should remain damp, like a wet sponge that’s been wrung out.
When compost is finished, just lift up the wire and move to a different location to start over.
PROS
- inexpensive
- easy to see when composting process is complete
- great for small yards
CONS
- requires manual turning
- outdoor space needed
- easily attracts pests and vermin
- no bones, meat, or dairy allowed
- may take 3 months to 1 year for completed compost
AVERAGE COST
about $25
MATERIALS NEEDED
- poultry fencing wire (3 feet by 10 feet, no more than 1 inch mesh)
- zip ties
- optional: 2 inch wide, 3 feet wood pieces for stabilization
- brown and green organic waste materials in 4:1 volume ratio
11. Trash Bag Composting

This type of composting is ultra simple and cheap. You basically put yard waste in a trash bag, ‘set it and forget it’ for a year while the materials break down, then, boom! Compost!
See also: How to Turn Yard Waste into Compost
HOW IT WORKS
Traditionally this method of composting begins in the fall, when dead leaves and other yard debris are abundant. Here’s how to make compost in a trash bag:
- Place all materials in a heavy duty, black trash bag and mix well. Fill the bag to capacity for best results.
- browns: 2-3 parts
- soil or finished compost: 1 part
- green materials, optional: 1 part
- water: 1-2 quarts
- Squeeze any air out of the trash bag and tie it so there is zero air flow inside.
- Then place the bag inside a second black trash bag and seal again. This is double protection against any rips or tears that may occur.
- Finally, store in a sunny location away from pests or in a heated location indoors and wait patiently for at least six months to 1 year.
PROS
- free or very inexpensive
- low maintenance
- perfect for small spaces
CONS
- creates a small amount of methane gas
- uses plastic
- may take a year or more for materials to fully decompose
AVERAGE COST
free
MATERIALS NEEDED
- plastic bag (preferably heavy duty black garbage bag)
- yard waste and other brown, carbon materials
- water
- soil/finished compost
Outdoor Composting Methods for Large Spaces
Finally, these last few methods of composting are great for bigger yards and outdoor spaces.
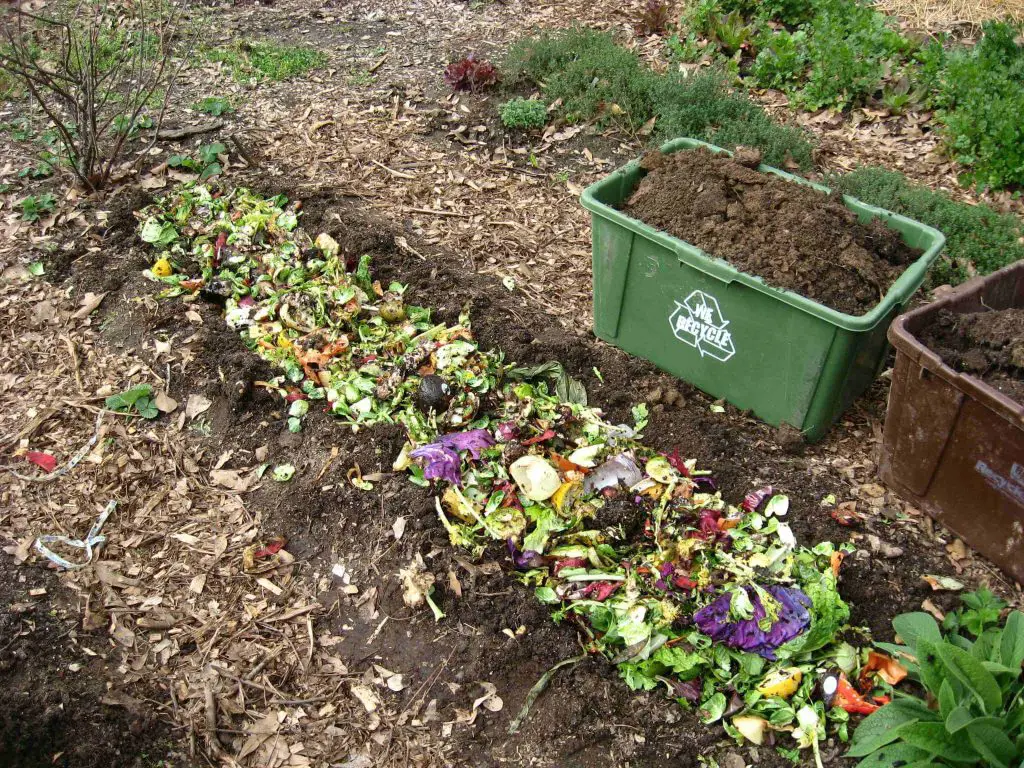
12. Lasagna Composting (Sheet Method)

Lasagna composting (sometimes called the sheet method) breaks down organic materials in layers on the ground, typically where a garden bed will be planted. No turning needed!
The Lasagna composting method is best began in the fall season. This allows the compost to fully breakdown before spring planting starts.
HOW IT WORKS
First, it’s important to choose the location wisely. Wherever you choose to start lasagna composting will be the site of your future garden.
Then, the following steps are important to follow:
- The first layer should always be newspaper, paper, or cardboard. This base layer will kill any weed or grass growth, and prepare the ground for future planting.
- Alternate brown and green materials in layers until the lasagna compost pile is about two to three feet tall. A layer of browns should be on top to deter pests.
- Water the compost pile as needed and wait. The layers will ‘cook’ down quickly in just a few weeks.
- In six to eight months the lasagna compost pile should be fully decomposed and ready for planting.
PROS
- no tilling or digging needed
- no turning necessary
- easy to maintain
- free
CONS
- unattractive
- brown and green materials must be gathered and stored in advance
- no bones, meat, dairy
- outdoor space required
- may attract pests and other animals
- may take 8 months+ for complete decomposition
AVERAGE COST
free
MATERIALS NEEDED
- brown, carbon rich material
- green, nitrogen rich material
- rake for tidying up lasagna layers
13. Trench Composting
Trench (or pit) composting is one of the easiest methods of composting in our opinion. Just dig a hole at least 12 inches, bury the organic waste, and cover it back up.
Some gardeners dig trenches between garden rows because the organic matter nourishes nearby plants as it breaks down. No garden? You can literally dig a hole anywhere in the yard with this type of composting.
HOW IT WORKS
Trench composting is anaerobic, meaning microbes don’t need oxygen to break down food. The waste is buried under the soil, therefore oxygen can’t reach it.
As the waste breaks down, it nourishes the soil and provides nutrients to plants. Above all, this equals healthier overall plants and higher crop yields.
PROS
- inexpensive
- no odors
- no turning necessary
- takes up no space and easy to hide
- benefits nearby plants in as little as one month
- deters pest and larger animals
CONS
- requires outdoor space
- manual labor needed to dig the hole
- waste materials must be gathered and stored in advance
- no bones, meat, or dairy (animals may smell it and attempt to dig it up)
AVERAGE COST
free + shovel for digging
SUPPLIES NEED
14. 3 Bin Composting System
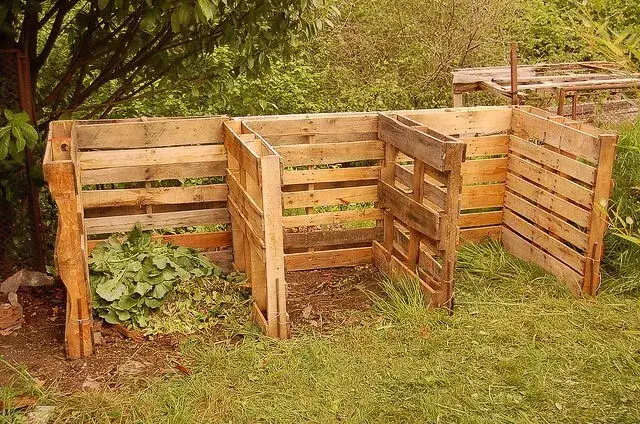
The 3 bin composting system works well for those with a lot of food, garden, and yard waste. If you don’t have a garden or large yard, this method probably isn’t for you.
Compost is created by keeping each step of the process separated.
HOW IT WORKS
Bins made of wooden pallets or boxes sort waste in three compartments:
- The first bin is where fresh brown and green material is added and stored. The waste needs to be turned every three to four days for faster decomposition.
- When the contents of the first bin are broken down for the most part, it gets transferred to the second bin to ‘cure.’ No further turning is needed at this stage. New waste can now be added to the first bin.
- Finally, the completed compost is moved from the 2nd to the 3rd bin and is ready to use.
PROS
- great for large yards and gardens
- continuous composting is possible
CONS
- requires outdoor space
- piles need to be turned and shifted to other bins
- may attract pests and other animals
- odors are possible
- can take 3 months up to one year for completed compost
- decomposition slows in cooler temps
AVERAGE COST
free if using recycled pallets (DIY directions)
$100-$200 retail
MATERIALS NEEDED
- (3) 3 feet by 4 feet boxed bins
- organic brown and green material
- pitchfork
Types of Composting Services
Lastly, composting services are always an option if the other methods feel too overwhelming or you don’t have a yard. No matter your budget or lack of outdoor space, there are still plenty of ways to responsibly discard food waste.
15. Free Composting Services
- Metro government drop off locations
- Many cities and towns offer free drop off locations for residents to bring their food and organic waste. Check your local government’s website for availability.
- Community composting
- Local community gardens (including school programs) sometimes offer free composting drop offs. It’s beneficial for both parties. Food and other waste is taken off your hands, and it’s turned into fertilizer to improve the community garden’s soil!
- Local farms
- Some farms accept food waste from the community to supplement animal feed. Check with local farmers in your area for any opportunities that may be available.
16. Subscription Based Composting Services
Finally, subscription services have began to pop up over the past few decades.
Some municipalities offer curbside compost pick-up, along with their recycling and trash services. San Francisco, Boulder, Seattle, Austin, Texas; and Portland, Oregon (among other cities) have implemented this service.
Otherwise, private composting services may be available. These companies typically charge a monthly fee in exchange for weekly compost pick up and a few pounds of finished compost throughout the gardening season.
Which Composting Method Will You Try?
Hopefully you’re inspired by these methods of composting! If everyone composted at home, we’d have healthier soil and save over 63 million tons of food waste from landfills.
So here’s to making the Earth a little healthier every day! Happy composting!
This page contains affiliate links, which means I earn a commission if you use them, at no extra cost to you. I only recommend products I actually use and trust. Please see my privacy and disclosure policy for details.
Leave a Reply